With even more ways to pull out wins and strategies in the world of CnC3, the community is in dire need of this TotW. There are a few ways to easily check yourself before you wreck yourself, and navigate your way around the map fluently and minimize the risk of allowing a sneak attack.
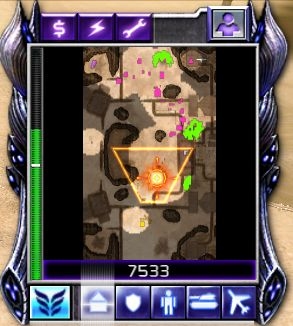
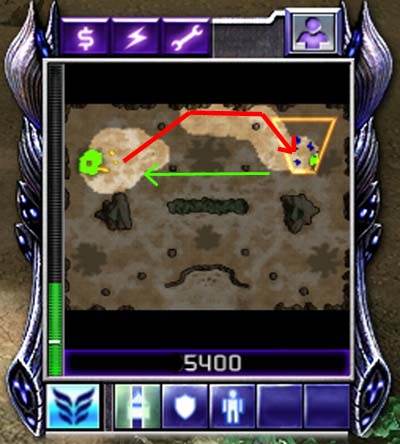
First, lets sit down and talk about the mini map. Although it is very difficult to depict single units, it is still a useful tool and it shouldn’t be neglected. The fog of war is more intense in Kanes Wrath than it was in Tiberium Wars, which makes scouting even more of a necessity. Revealing the Fog of War allows you to see your opponents units trying to make a move.
Another nice tool you are given is your spacebar. If anything happens and grants you notification i.e. “enemy spotted” “Unit under attack” “enemy commando detected” by pressing the spacebar you will automatically be jumped to the location of this event.
Lets talk a bit about anticipation. If your opponent is GDI, you need to look for air on your harvesters. If your opponent is a variant of Scrin, look out for flanking Mechapedes. Generally you will be notified, but unless it is just a single unit barreling towards your base, you should have no trouble seeing the incoming unit on your mini map. In a game you generally shouldn't have to constantly consult your minimap. Be quick with your mouse and never sit idol waiting for something to build (unless your microing) keep an open eye and ear throughout the game and the better this is done, the less you will be wondering why you lost. However, going back to fog of war, if you aren’t properly scouting, it might be too late.
In Kanes Wrath, scouting is even more important given the faction diversity and overall options in building your arsenal. Early game scouting is generally the most important and in scouting, you are also setting up early game map control.
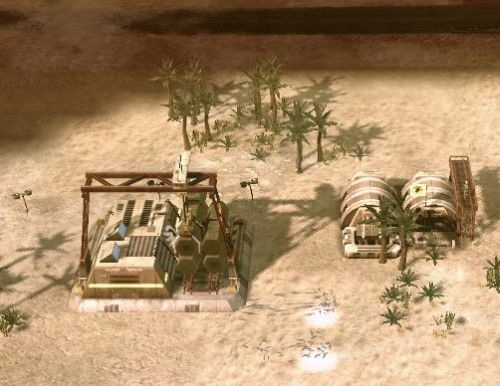
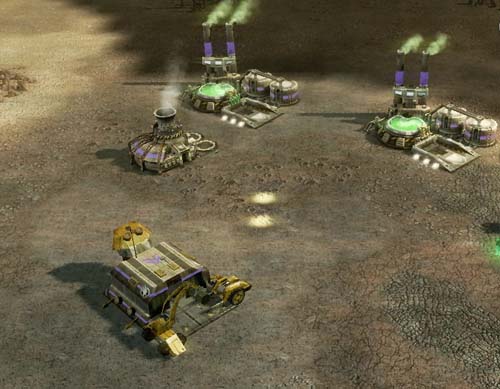
Garrisoning Buildings is very important throughout games, and when buildings are available they should be utilized for scouting. They increase the range lifted off the fog of war and allow you to see your enemy incoming and have some extra time to counter it.
It is crucial that you find what your opponent is doing so you are given all the time and options necessary to counter it. In the early game, each faction has different units that do a good job countering. All Nod factions have the Raider Buggy and Attack Bikes, which are great for scouting, and early game harassment. GDI has the Pitbull, and its speed gives GDI an early harassment and scouting tool. Scrin, on the other hand, got the short end of the stick in regards to early game scouting. Make good use of Buzzers and their speed allow them to work their way into your opponents base.
As your unit moves along it reveals the fog of war and gives you 30 seconds of peeking time before it is covered again. That said, it is very important that you are constantly scouting the map. Here are a few easy options:
With GDI
GDI's air is very fast and maneuverable. Use this to your advantage and be sure that if you are giving your opponent time to breathe, that you watch your flanks. Dont forget to use your Radar Scan either, at only a measly $500 you can see what your enemy is up to instantly.
With Nod
In the early game, Nod should make use of its Raider Buggies. They are cheap, and a great way to scout your opponents base. In the Mid game, when you can't squeeze a light scout by your opponent, try using your decoy army on a harvester. (unless you are BH) It is a cheap way to stealthily scout your opponent that is very cost effective and well worth the sticker price.
With Scrin
Yet again, Scrin receives the short end of the stick, but you need to be sure you are always moving your army around. Keep Buzzers roaming the map periodically to check in on your opponents teching process and where his units are located.
The better control you have over your opponents productivity and unit production, the better your odds are when it comes to countering his arsenal. That said, when you see your opponent trying to scout you, weather it be early game or late game; stop his scout in its tracks and make it a priority to keep the element of surprise in your favor.
Taking the alternative route
Scouts may be fast, but their armor is almost paper and in most cases if they run into an enemy base head on, then the chances are they will be annihilated before getting any vital info. A good way to use your scouts is to take the alternative route. Dont send your units along the main battle fronts or regular scouting paths; try and sneak them behind the enemy base for maximum effect. This simple strategy can greatly improve their survivability and get you more intel on your opponent.
Learning how to lead shots with your units in CnC3 is very important, and can be vital to the success of certain units. If you are having trouble properly controlling Artillery units, ZOCOM Orcas, or any other unit you are having trouble targeting, this TotW will explain the art of force firing and leading your shots.
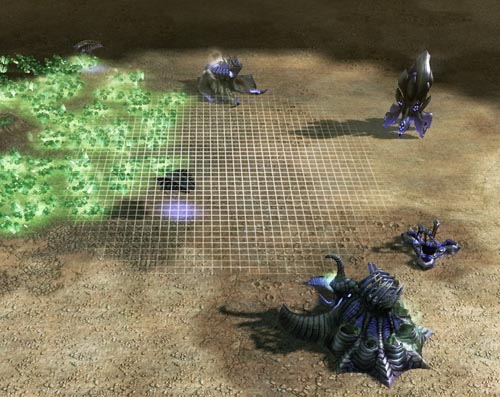
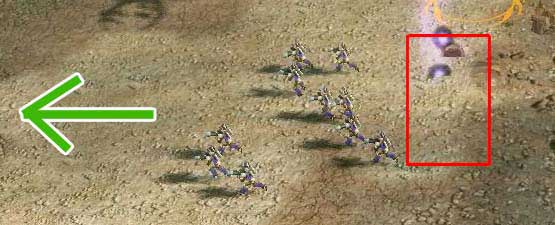
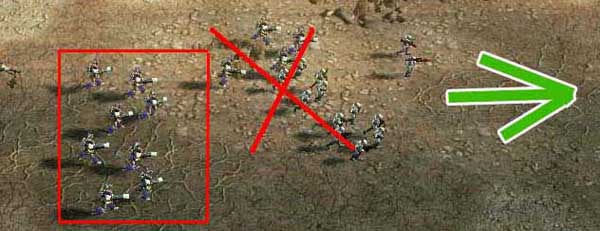
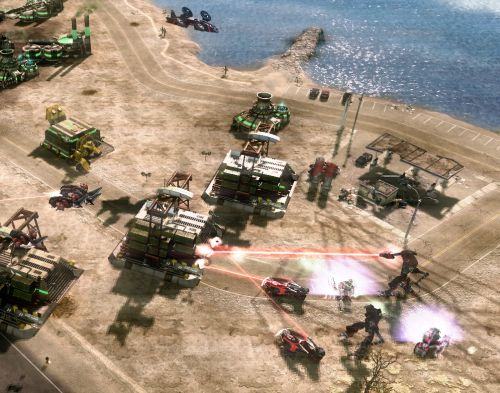
As you can see; the Devastator Warship's discs are missing the Zone Raiders and hitting the area indicated by the red square. This is because they were ordered to attack normally, so they fire where the Zone Raiders were as the shot was fired and not at the direction where they are moving.
Using force fire (Ctrl + A), both Devastator Warships fired towards the red X. The discs arrived by the time the Zone Raiders in the box entered the area and therefore they were destroyed. Remember to cancel the force fire order (hotkey S) after every volley, or the Warships will continue to attack the same spot.
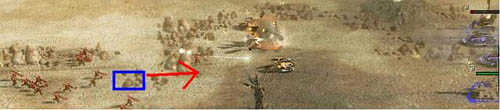
Above you can see a veteran scorpion tank retreating toward its base. To hit this tank with Orcas (and grenadiers for a little extra damage) You will need to force attack into the blue square.
In this last example you can see that this specter is trying to target a group of infantry. Specters are especially slow at firing, and the shell itself is not very fast. To hit the target, you will need to force attack in the blue box to hit the center of the infantry group. Remember that you need to lead more generously with specters than with most artillery units in the game. 作者: 歸去來兮 时间: 2008-6-10 02:30:23
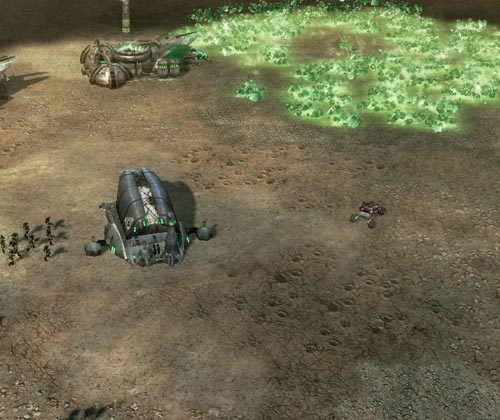
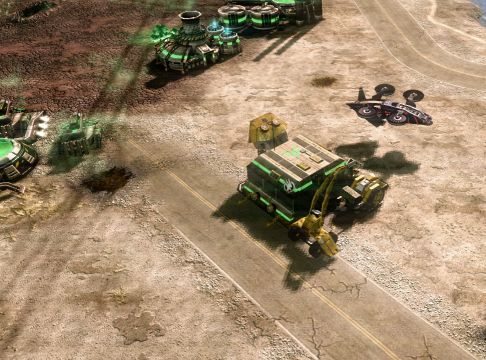
Call for Transport is a very important tool that both GDI and Nod can use once they deploy an Airfield. The transport can be used to transport Engineers long distances, provide some mid game harassment, and push around Commandos.
Engineers
With the nerf of Engineers in Kanes Wrath forces those of you who love capturing buildings to get a bit more creative in doing so. However, despite their 3 second capturing delay, Engineers are still very useful. The Call for Transport is still a very effective option to use in the mid/late game scenario for your Engineers. The best ways to use this upgrade is to be sure you can do it without your opponent scouting your transport. Second, use the sides of the map to your advantage and microing the Call for transport with your units is crucial to success. Be sure that when bringing the Drop into your opponents base, you are distracting him and putting pressure elsewhere. When dropping off the transport you should make the drop off point near your opponents building.
Commandos
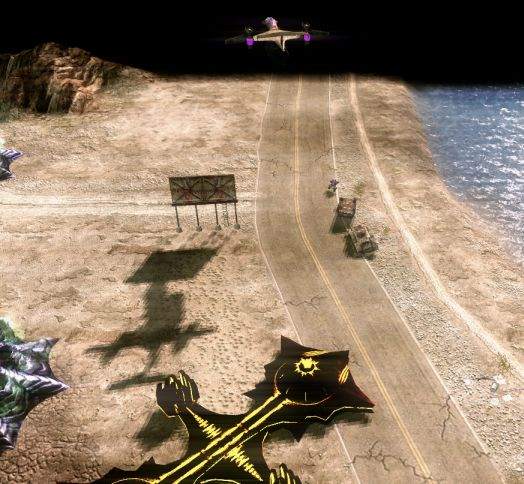
There are a few perks about using the Call for Transport with the commando. Namely, your opponent won't get the warning until the commando has landed (hopefully) in his base. Micro'ing the Transport is very similar to that of the Engineer, and it is important that you watch for AA, and are careful with the placement of the Commando once you enter your opponents base.
Microing the Transport
When you are utilizing this tool, keep in mind the health that each Transport has. It is very little, and that said you need to be sure it stays away from enemy fire. You should fly the transport over "non-action" zones, and over terrain difficult for any opposition to your Transport. When you are dropping off your transport, keep in mind the 5 second unload time. You will want to be sure you are distracting your opponent to the best of your ability when you are unloading/entering your opponents base. Be sure that you move in so that your opponents radar won't warn him of the incoming Transport.作者: 极品西瓜刀 时间: 2008-6-16 22:13:39
Nothing can be more annoying than losing a harvester early on. Most players live by the motto "the best defense is a good offense," but this can leave your harvesters wide open for attack. Its better to follow the mantra "the best defense is the one that exists".
There will come a time when you won't be able to use mainstream combat units to defend your harvesters - following these techniques will buy you valuable time to delay your opponent from killing your harvesters. Although this may not save your harvester, its better than leaving it as a sitting duck.
First and foremost, remember to scout the enemy to see what his forces are up too. If you see a lot of Attack Bikes, Pitbulls or Ravagers then expect that "Harvester under attack" warning. Always make sure you have some units stationed in your base, in case of a sneaky attack. The following three micro techniques will help you keep your harvesters safe.
Circling Cover
When the enemy attacks a single harvester, run it to nearest War Factory or Refinery. The key here is to circle around the building as many times necessary to block the attack units from reaching your harvester. This technique is very effective against single target hunters like Attack Bikes and can really give you that extra few seconds for you to bring back (or build) the cavalry.
Shielding
Before you say this is for Reaper-17 only, its not. Shielding involves using cheap structures, like a Barracks or Powerplants, to be quickly constructed between the enemy forces and your harvester. To do this make sure you have a structure queued in your construction tab and as soon as those harassers attack your harvester build the structure right in front of them and run away. Rinse, wash, repeat. By keeping a steady supply of shields to detour the enemy attack you can effective delay them for your forces to take them out. Additionally you can place 2 buildings at once to create a larger obstacle if you have a second build queue. If possible, its best to use buildings that are needed for teching up, and crawl in the direction of another tiberium field. That tactic takes care of two birds with one stone.
Tag Team
This is a very risky and very hard to use technique. When your harvester takes damage run towards your nearest War Factory. Now here comes the tricky bit: quickly select your War Factory and command your drones to focus on repairing it, meanwhile use another harvester to block the enemy units so the damaged harvester can get repaired. The key here is to get your opponent to swap targets from the damaged harvester to the 'shield' harvester. This will allow your damaged harvester to be repaired to full health so it can quickly swap places with the shield harvester and thus the cycle repeats itself. Also remember to use the Circling Cover method to compliment this maneuver.
Summary
Having no defense for your harvesters isn't a good idea if you want to keep your economy afloat
If your harvesters are being attacked, don't sit around waiting for units to get there. Perform these maneuvers to grant you more time
Practice will reap dividends and mastering these techniques will make you a much more skillful player
Base Defenses have a greater tactical role in Kane's Wrath than Tiberium Wars and placing them in the right spot at the right time can win you the battle. Many players tend to spam them without thinking if it will have any tactical value or strategic positioning, but with this guide and a little experience you can really give your opponent a tough time taking down those defenses. Do remember that base defenses are no substitute for units but again they do have their importance.
Tower Defenses
Watch Towers, Obelisks of Light and Storm Columns all have one thing in common: the ability to shoot over buildings. Use this to your advantage and place them behind high hit points structures or build temporary meatshield structures; preferably Power Plants that help sustain them. The enemy will have to decide whether he should flank the defenses and risk his units being surrounded or try and plow through the meatshield and being exposed to your army. This simple and effective strategy can ultimately save you the cost of rebuilding these defenses.
Nod Base Defenses
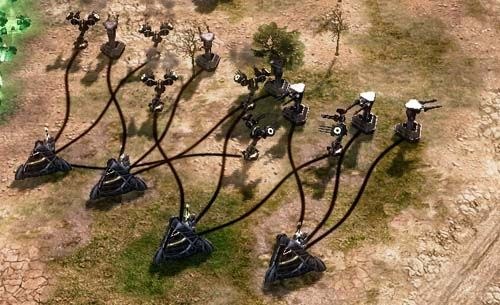
The Shredder, Laser and SAM turret are a trademark of The Brotherhood because of their flexible positioning. Placing 3 turrets around a central hub is easy, but with a few simple tricks you can make them even more deadly. There are two tactics you can use. First there is the "Spaghetti" formation. This will require placing 3-6 turrets into an interlocking wall which is very hard to penetrate with conventional units. This dastardly tactic is perfect for your front line defense and the multiple turrets firing at once may make your opponent reconsider before sending in his forces. Don’t forget to research Quad Turrets at your Operation Center to give you an extra firepower.
Secondly there is the "Ghost" formation. This will really help your turrets last longer and save you money. The best way to use this is to find a shield structure and place the hub behind it, now place the turret in front of it or in opposite directions. Because you're placing the turrets through the building they almost look hubless and killing it will be very tricky. Alternatively you use cliffs to build your turrets in very hard-to-reach positions which only artillery or air units can reach.
Anti-Air Defenses AA Batteries, Sam Turrets and Plasma Disc Launchers can be built practically anywhere in your base, but again with a little thought of positioning they can perform at their very best. Try and estimate where the enemy would most like send air units. The key targets are Harvesters, Tech Centers, Power Plants, War Factories and ground base defenses. One or two AA Defenses may be suitable against Orcas, Venoms, Hammerheads and PACS but certainly not Firehawks, Stormriders or Vertigos. 3 to 4 AA defenses covering each other each other can effectively stop any squadron and certainly survive longer.
All of the Rest
Unfortunately the other turrets like the Guardian, Photon Cannon, Sonic Emitter and Buzzer hive don’t have very special ways to be position however there is still one trick you can pull off. Instead of placing them before the enemy army shows up, place while they're preoccupied. A Sonic Emitter behind the enemy army can cause serious havoc and practically obliterate anything close to it. Always wait until the enemy is inside your build radius before placing it and make sure you have enough power to keep it going.